
Tattoo
How a Permanent Tattoo Is Made: The Stages
Updated: 1 February 2026
First we need to know which layer of the skin the tattoo is applied to. Human skin has 3 layers: the epidermis, the dermis and the hypodermis.
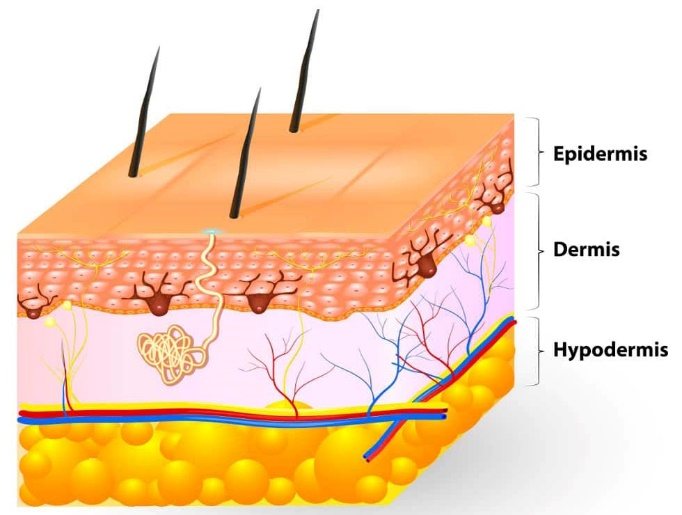
The outer layer of our skin, the epidermis, acts like a laminated glass window over our tattoo. The ink must reach the dermis, the target layer, where the body’s defences do not remove it.
The stages of tattooing are as follows:
-
Choosing the design: the right design the client wants to carry should be chosen with the tattoo artist’s help and resized to a suitable size. The placement of the design must also be considered.
-
Preparing the design: once the design is the right size, it is transferred to the body using tracing paper, special carbon paper, a transfer pen or a printer.
-
Transferring the design to the body: before this step the client’s body must be ready for the transfer.
a) Wash the skin with soap or similar.
b) Shave the hair from the skin with a single-use razor.
c) Disinfect the skin with an antiseptic solution or similar.
d) Carefully transfer the design to the skin using transfer solution and gel.
e) Let the transfer dry completely, otherwise it may spread on contact.
-
Preparing the setup table: first the setup table is sterilised, and the area where the materials will be used is covered with stretch film or single-use pads. The machine equipment is set up and adjusted. Single-use needles suited to the design are prepared, and as much ink as is needed is placed in single-use ink caps (a cap holder can make this easier). This is also the stage where the petroleum jelly is prepared, which lets the needle move in and out of the skin more easily and minimises damage to the tissue, along with the solution used to clean the skin during the work. (Because putting a hand into the petroleum jelly could spread infectious diseases, it must be taken out with a single-use wooden spatula.) Finally come the indispensable single-use sterile gloves.
-
Setting up the machine: if the needles used are not single-use, needles prepared by soldering are sterilised in an autoclave and packed without being touched by hand, and must be opened in front of the client as single-use items. The needle suited to the work is chosen and fitted to the machine. The machine is connected to the power adapter with clip cord cables, and the voltage and amperage appropriate for the tattoo are set with the pedal. The ink in the cap is drawn into the tip, and once work begins, the ink gathered at the tip is injected into the dermis. The tip must be compatible with the needle, otherwise problems such as ink spraying, not enough ink being delivered or skin damage can occur.
-
Doing the tattoo: once everything is ready, the tattoo chair is shaped to suit the area being tattooed, a single-use cover is laid down, and the client is seated on the chair. The work is always applied from the bottom of the transferred design upwards, and keeping the skin taut during the work is very important for clean lines and for the skin to take the ink well. Care must be taken not to wipe off the transfer while stretching the skin. In general, the outline (contour) is done first, in case the tattoo is smudged, and once the stencil is removed the work continues with filling and shading. While working, ink smeared across the skin should be cleaned often with diluted antiseptic soap or solutions. Any part that will be worked without touching the needle should be softened with quickly dissolving petroleum jelly, which keeps the skin from deforming.
-
Aftercare: see our tattoo aftercare guide for both methods (surgical tape and cling film) in full.
Have questions?
Let's talk through anything you're wondering about before you book.
